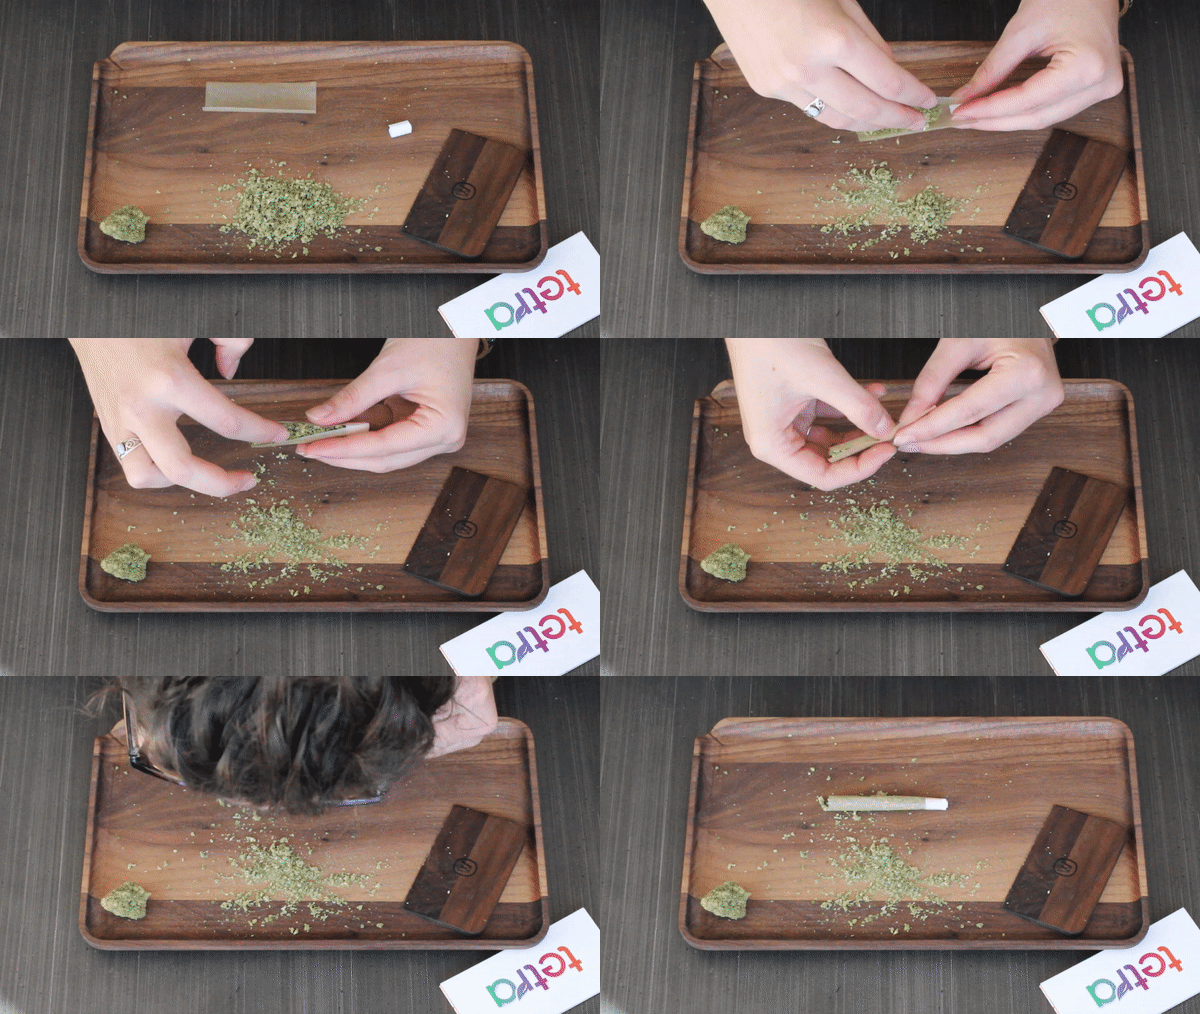
What a time to be alive! Pot shops are being advertised on billboards and everyone’s favorite portable smoking method is now available for easy in-store purchase—pre-rolls. While it’s certainly convenient and exciting to walk into a store and buy pre-rolled joints, there’s no substitute for the hands-on experience of rolling your own.
Not sure how to go about rolling your own J? That’s okay, we won’t tell anyone that you’ve made it this far without learning. Here’s a run-down of three joint rolling techniques, spanning novice, intermediate and pro.
A word of advice before we jump in: Don’t turn yourself off from the art of the roll by starting at the expert level and bumming yourself out. Even the most experienced of cannabis consumers among us struggle with rolling their own joints.
As with anything, the first step is to be prepared. There are countless joint rolling accessories on the market to make your foray into DIY doobies as painless as possible. If you don’t know where to begin with joint rolling accessories, check out these Tetra product reviews.
Once you’ve got your mise en place, the next step is to grind your bud. Some people are old school in that they’d rather grind their weed sans tools, but we love the speed and efficiency of a nice grinder. However you choose to break apart your greens, just make sure they are free of stems and seeds.

Now, let’s talk about joint rolling techniques.
Method: The Machine Roll
Level: Novice
Manually-operated joint-rolling machines are the perfect starting point for anyone looking to understand the mechanics behind rolling a J. On each side of the machine, there are little pegs that control how open or closed it is. To begin, make sure the movable pegs are in the open position so you can lay your freshly ground greens on the rolling band with ease.
This is usually the part where people get really excited and overload the machine with weed. Try to avoid over-eager pot stuffing, because no matter how badly you’d like to roll the fattest of fatties, the end result will always be less than favorable.
Filling the machine with too much weed will compress the joint to such an extent that you won’t be able to pull air through it once it’s lit. This means wasted pot, wasted time and, most annoyingly, joint canoeing. For those who don’t know, joint canoeing is when one side burns faster than the other.
Once you’ve filled the band with a reasonable amount of bud, move the pegs on the side of the machine into the closed position while taking care to tuck the weed inside the folding band. This will trap the greens in the middle of the machine, so in theory you should have no problem taking the machine and turning it every which way without losing any plant matter.
If it’s a struggle to close without weed busting through the top where the bands meet, that’s your cue to open it back up and remove some greens. The importance of not overstuffing your machine cannot be overstated.
With an appropriate amount of bud closed up inside the machine, use your thumbs to roll the front of the band in a downward motion. A few swipes should do the trick, because the more your roll it, the more compacted it will become.
You’ll probably notice that this downward thumbing is similar to the motion you see people follow while rolling a joint without a machine. The concept is the same, except the machine does it with a rolling band instead of a rolling paper. Think of it as finger-placement practice for your future pro-level joint rolling attempts.
After a few downward swipes, you’re ready to wrap it up in rolling paper. Make sure the size of your paper matches the width of your machine, or else you’ll be in for lots of bunching and frustration. Gently set the paper into the slit where the band meets at the top of the machine with the sticky strip at the top and facing you.
When the paper is positioned in a way that it no longer requires your support, continue with the downward thumbing until only the sticky strip of the rolling paper is visible. Get the strip wet with your saliva—rubbing your tongue on the inside of your bottom lip will usually give you the stickiest spit—and then finish the job by continuing with the rolling motion until the paper has completely disappeared inside the machine.
Voila! Congratulations on your first DIY joint. Feel free to slide a crutch into one end or just light it up au naturale. Nothing like a little weed debris in your teeth to really revel in the experience.

Method: The Canoe Roll
Level: Intermediate
Ready to ditch the machine but not quite confident enough to bust out a pro-level roll? The canoe method is a fantastic intermediary. While the name of this rolling technique is similar to the unwanted phenomenon of joint canoeing—in which one side of the J burns faster than the other—there is absolutely no relation between the two. In fact, employing the canoe method is generally one of the best ways to avoid joint canoeing.
To make a canoe, hold your rolling paper with the sticky strip up and facing you. Gently fold the right bottom corner underneath the top right corner so the sticky strip wraps on top of the backside of the bottom corner. Take care to do so without making any creases on the sheet.
The next step is to pinch and twist the right edges together toward you to form one half of a small paper canoe. While it is possible to use the canoe method without paying mind to which corner wraps around which, following the above instructions will make for a much smoother rolling process.
With the canoe end secured, you can begin the process of loading freshly ground greens into your boat. At this point, it should be totally obvious how this method acts as a stepping stone to pro-level joint rolling techniques. If not, you’re probably doing it wrong.
Once you have an appropriate amount of bud cargo loaded into your canoe, you can begin the process of massaging the weed inside the rolling paper. This is where having the sticky side wrapped around the bottom corner will really come in handy, because when all’s said and done, that’s where the rest of the paper will need to follow.
After the weed has been coaxed into a nicely formed log, it’s time to start easing the bottom half of the rolling paper over the greens and underneath the top of the rolling paper. To reiterate, the sticky strip should be folding face down around the outside of the paper along the bottom.
When a nice pointed joint begins to take shape, slide your saliva-covered tongue along the sticky strip to glue your canoe shut and bam! Canoe joint goals realized. Don’t worry about how misshapen it might be. The most important part is that it’s sealed, compacted and ready to light.
Method: The Classic Roll
Level: Expert
The pro-level rolling technique is a daunting undertaking for those who have never attempted it; and truth be told, it will probably take some dedicated practice and trial and error to get it right. Don’t let that deter you, though—even the swiftest and most advanced joint rollers had to start somewhere!
When it comes time to practice your classic roll, a flat and even surface is a non-negotiable must. Rolling trays are great for their portability, but a table or counter will also do the trick just fine.
With your flat surface in front of you and your paper in hand—sticky strip up and facing you—gently bend the paper into a U shape by pressing down in the center with your pointer fingers. This will create a valley in which you can begin to load your greens.
Once you’ve placed your ground buds into the U-shaped sheet, bring both sides of the paper together at the top so the weed is trapped inside. Support the back with your pointer and middle fingers while using your thumbs to gently rub the tops of the paper up and down against one another. This will roll and compact the weed into a log, and functions in the same way as the bands from the rolling machine.
After your greens have been rolled into a nice weed log, it’s time for the hard part. Keeping your fingers wrapped around the paper in the same position, use your thumbs to pull the side closest to you down to the top of the compacted pot. With one fast and tricky motion, reverse the direction of your thumbs to fold the paper over the top of the log and underneath the other side of the paper.
As soon as the paper is snugly tucked around the log, continue the upward thumbing motion until only the sticky strip is visible. Give it a nice, slobbery lick and finish the job by folding it around the outside of the bud-filled paper. Ta-da! Go ahead and slide in a crutch or go straight to lighting it up and relaxing—you’ve earned it!

